The Best Pond Building Methods 10 Ideas
The Best Pond Building and Construction Tips
The construction materials chosen for your water feature will determine the best pond building and construction methods used. If you do not have the necessary skills, you may want to hire an artisan to assist you, or even employ a contractor to do the work. Always ask for references and check with previous clients before deciding to use outside services.
Setting Out
Before you do anything else, it is necessary to mark out the position of your water feature. Whether you are building a raised pool or sinking a pond into the ground, peg out the area, or outline its proposed position with a hose-pipe, rope or chalk.
The simplest and best pond building method is to set out an irregular one which is to be sealed either with a flexible liner, concrete, clay or bentonite clay. Here accuracy is not essential, providing you maintain the basic size and shape you have used for estimating materials.
When utilizing a rigid shell, you can place this on the ground and draw around its perimeter. If it has a symmetrical shape, place it upside down so the lip is included in the layout; otherwise stand it upright and simply allow for any wider areas.
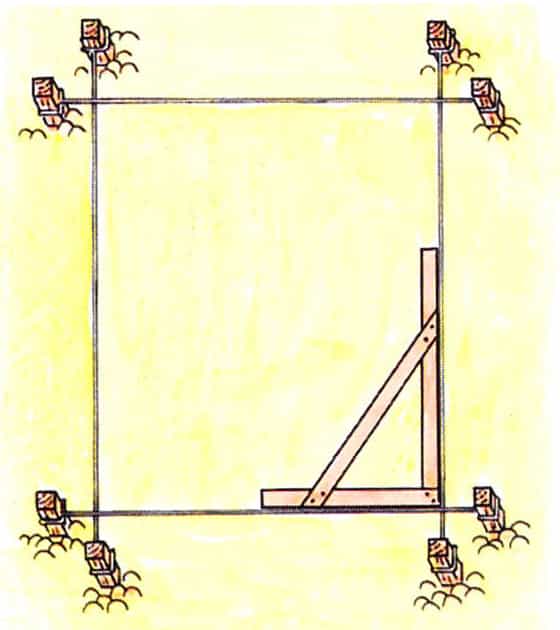
For a rectangular or square pool, it is essential that corners are at right-angles. A reliable way of doing this is to use what is known as the 3:4:5 method. A home-made wooden square (see illustration below) is helpful here, especially if the pond is small; or you can use a steel builder’s square and a tape to check for accuracy. First of all, the two diagonals must be identical when measured from corner to corner. Check this and then, working from one corner, measure 300 mm (1 ft) and 400 mm (1 ft 3 ¾in) along the two adjoining out- side edges. Mark these points with pegs and check the distance between the two pegs. It should be 500 mm (1 ft 7 ¾ in). Repeat at the other three corners.
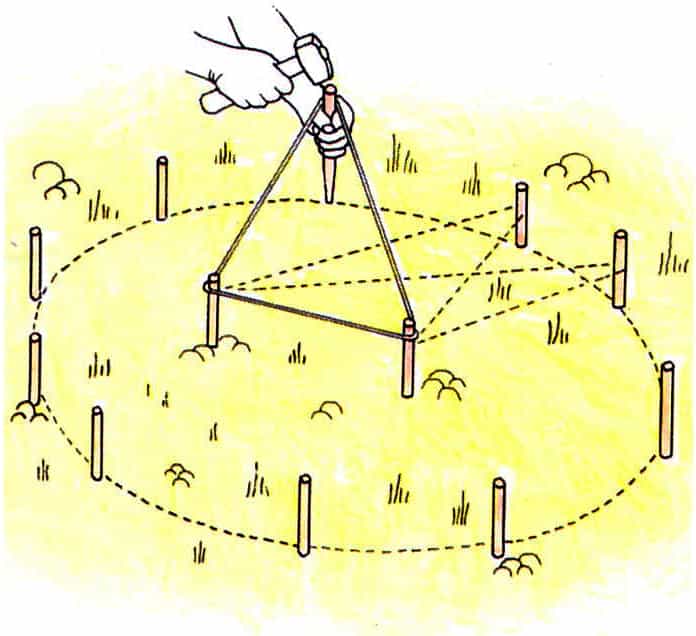
To set out a circular design, you can use a ‘compass’ made with pegs and string. Simply knock a peg or stake into the center of the proposed pool area and attach a piece of string to it, the length of the radius. Attach the end to a second peg or stick, pull the string taut and scrape it around in a circle to mark the circumference on the ground
An oval shape is marked in a similar way to a circle. Two stakes are driven into the ground and a piece of string is attached to them to form a loop (see illustration). Pull the string taut and stick a peg in the ground at the furthest point. Repeat several times around the perimeter, so indicating the basic outline. Note that the closer the pegs are to one another, the more circular the shape will be.
Sealing With Sodium Clay
The technique used to seal a pond with sodium clay or bentonite powder is similar to the traditional method of clay puddling. Whichever material you use, it is vital to compact it thoroughly to make the pond basin thoroughly impervious.
Sealing with bentonite is a relatively simple operation, but as with any other building method, it is important to follow the correct procedure and to use materials mixed in the correct proportions.
This Sodium Bentonite Clay is the best for creating your own pond
Excavation is the first step, but since the bentonite is mixed with soil, some of this must be retained on site. This special clay may be used to waterproof any shape or size pond. However, it is essential that the walls do not slope more than 1:3. If the gradient is too steep, it will be impossible to compact and seal the sides.
It is vital to remove all stones and vegetation and smooth out the soil so you have an even surface. If rocks are to be retained in the design, it is best to reposition these once compaction is complete.
You will need to compact the interior of the shell before the bentonite is spread over the surface. A homemade punner is adequate for most small ponds; or you can use a mechanical compactor, provided it is suitable for use on the sloping walls.
The quantities of bentonite required for pond sealing are specified HERE. It can either be laid as a blanket over the pond basin, or mixed in with the soil. If applying a mixed blanket, you can blend the soil and sealant first, perhaps using a concrete mixer; or you can mix the two materials on the pond floor.
When sealing ponds with a pure blanket of bentonite, it is absolutely essential that the material is spread out evenly. It is only compacted after it has been covered with a 300 mm (1 ft) protective layer of soil and the entire area moistened slightly. Always ensure that the whole operation is completed the same day.
If you decide to mix the bentonite with soil, the simplest method is to spread it over the surface, cover this layer with about 100 mm (4 in) of soil, and mix it together thoroughly in situ. If you blend the materials externally, it is important to establish exactly how much soil you need.
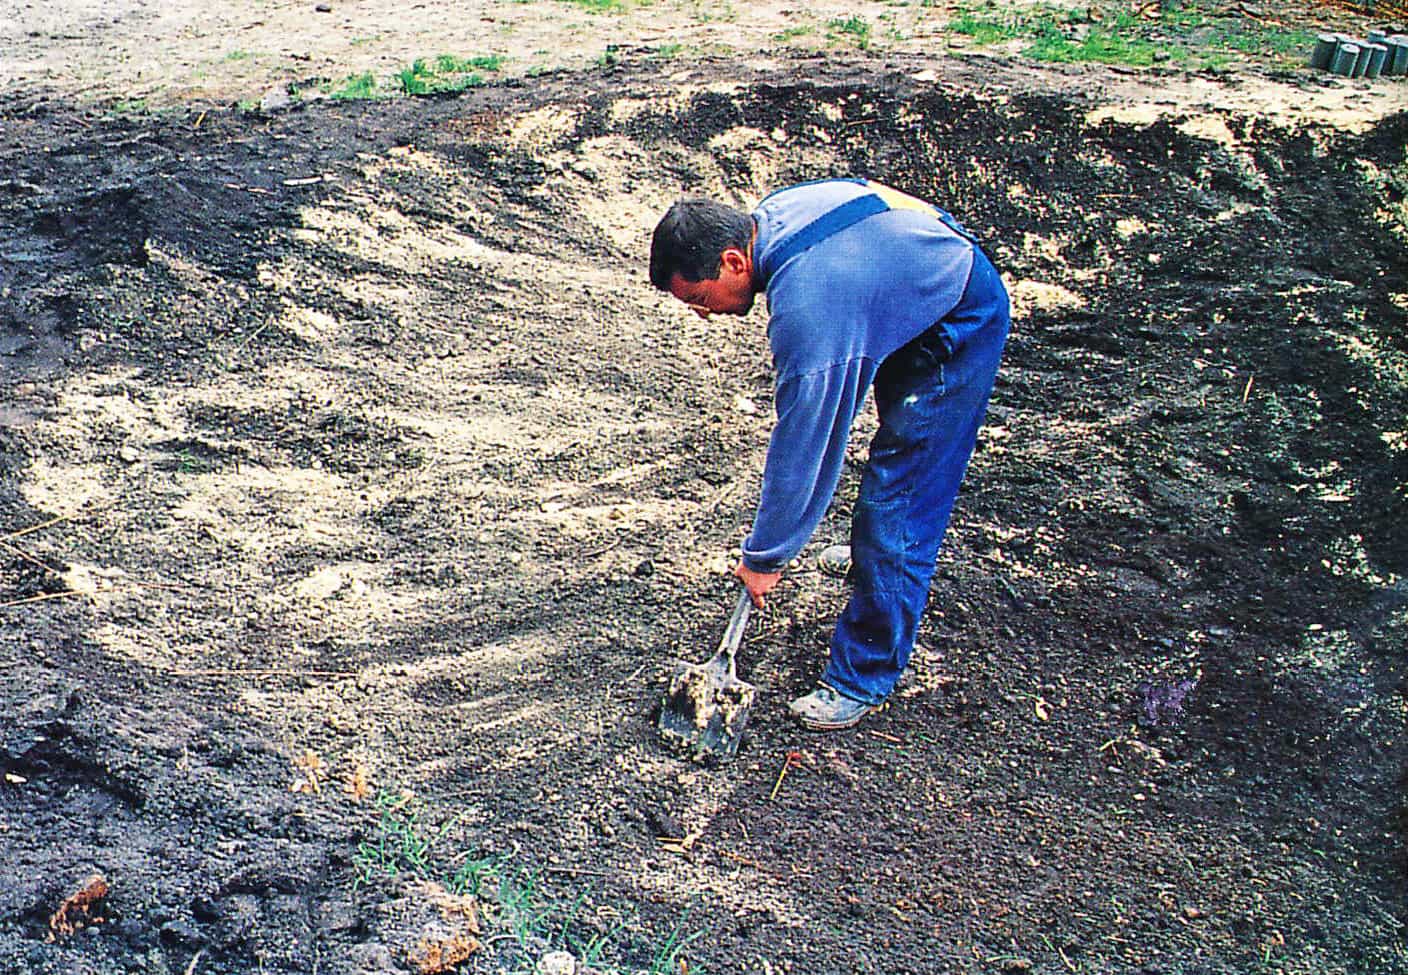
This layer must be thoroughly hydrated prior to compaction. Then spread another 100 mm (4 in) layer of soil on top, water lightly and compact some more.
Whichever method is used, it takes a while for the water to react with the bentonite, but when it does, you will see the top layer of soil drying out. After about 48 hours, wet it again; leave overnight and fill the pond the next day.
Where fibrous matting impregnated with bentonite is used, this is laid over the floor and sides of the pond and covered with compacted soil.
Installing Liners
No building skills are necessary to install liners in the ground, although it is vital to ensure that the upper edges of the pond are level. If one side is higher than the other, this will be obvious once the pool is full. The best pond building tool is a spirit level that you can set on a straightedge and will enable you to check the surface around most ponds. A post or peg set absolutely vertically in the center of the excavation will enable you to pivot the straightedge and so check levels at different points around the perimeter, a method which is particularly useful for a circular or oval shape. If the pond is very large, you may have to use a dumpy level.
We can recommend this liner that has a 5 Star rating:
Flexible liners are particularly simple to fit. Regardless of which material you are using, the liner is draped into the hole so that the center sags on the ground. The edges are secured with bricks or stones around the perimeter and the pond filled with water.
As you fill the pond, you can straighten out some of the creases and folds. The success you have will depend on the material you are using. Butyl rubber is probably the most flexible liner available; and PVC tends to stretch into the excavated shape more easily than polyethylene.
It is not necessary to trim the liner to the shape of the pond until it is full. Trimming is done with sharp, multi-purpose scissors, leaving 300-500 mm (1 ft-1ft 8in) around the edge. Tuck the edge of the liner into the soil and place rocks or slabs around the edge, or secure by paving over the excess liner as illustrated on our “Pond for Ducks” page.
Some people advocate lining the excavated hole with a layer of soft sand before installing the flexible liner. This step is only really imperative on a stony site; usually any twigs, stones and other sharp objects which could damage the liner once it is filled with water, should be removed before the liner is fitted.
Rigid liners may be installed both below and above the ground, but you will have to build a supporting wall of some sort around a raised pond.
This has to be one of the neatest Pond Kits that we have seen:
For below-ground ponds, installation for all types of rigid liner is basically the same as for the project “Pre-Cast Pond”. It is necessary to dig a hole slightly larger than the shell and ensure that the base of the excavation is flat and smooth. Use a spirit level and a straightedge, and ensure that you bed the shell so the lip is below the surrounding ground, otherwise you will not be able to hide the rim with an edging.
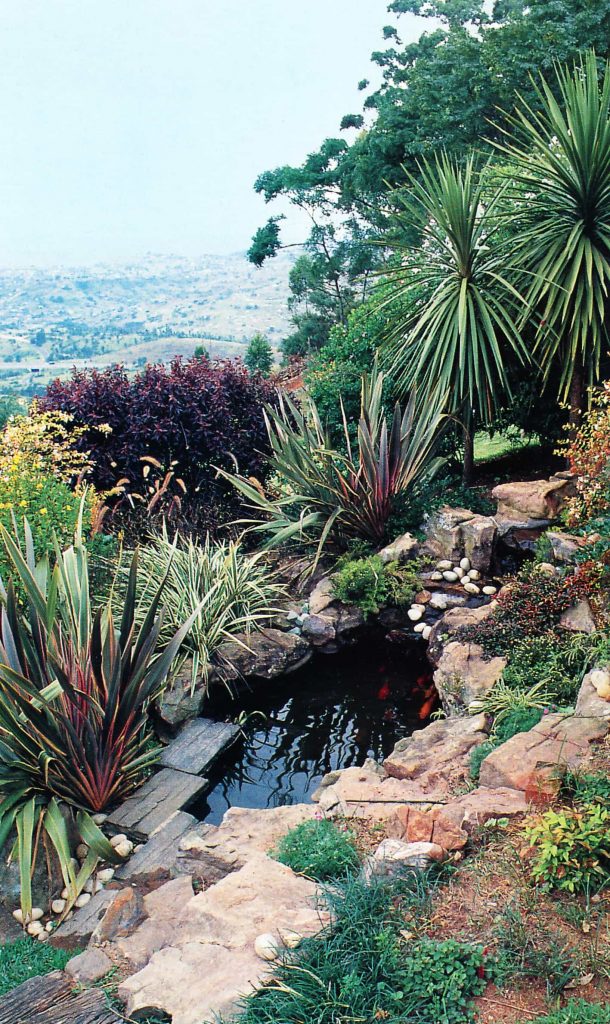
Once the liner is in position, shovel sand or soil between the walls of the shell and the sides of the hole. It is a good idea to bed the liner on a layer of well compacted sand. if the design you choose includes a plant shelf, the excavation must allow for this. Care should be taken to backfill and compact thoroughly so that it is stable.
A raised pond should be set on a flat, level surface before the space between the liner and the wall is back-filled to maximize rigidity and stability.
While some people backfill with mortar or a dry cement and sand mixture, the high alkalinity of cement may, over a period of time, lead to the deterioration of materials like fiberglass.
Working With Concrete
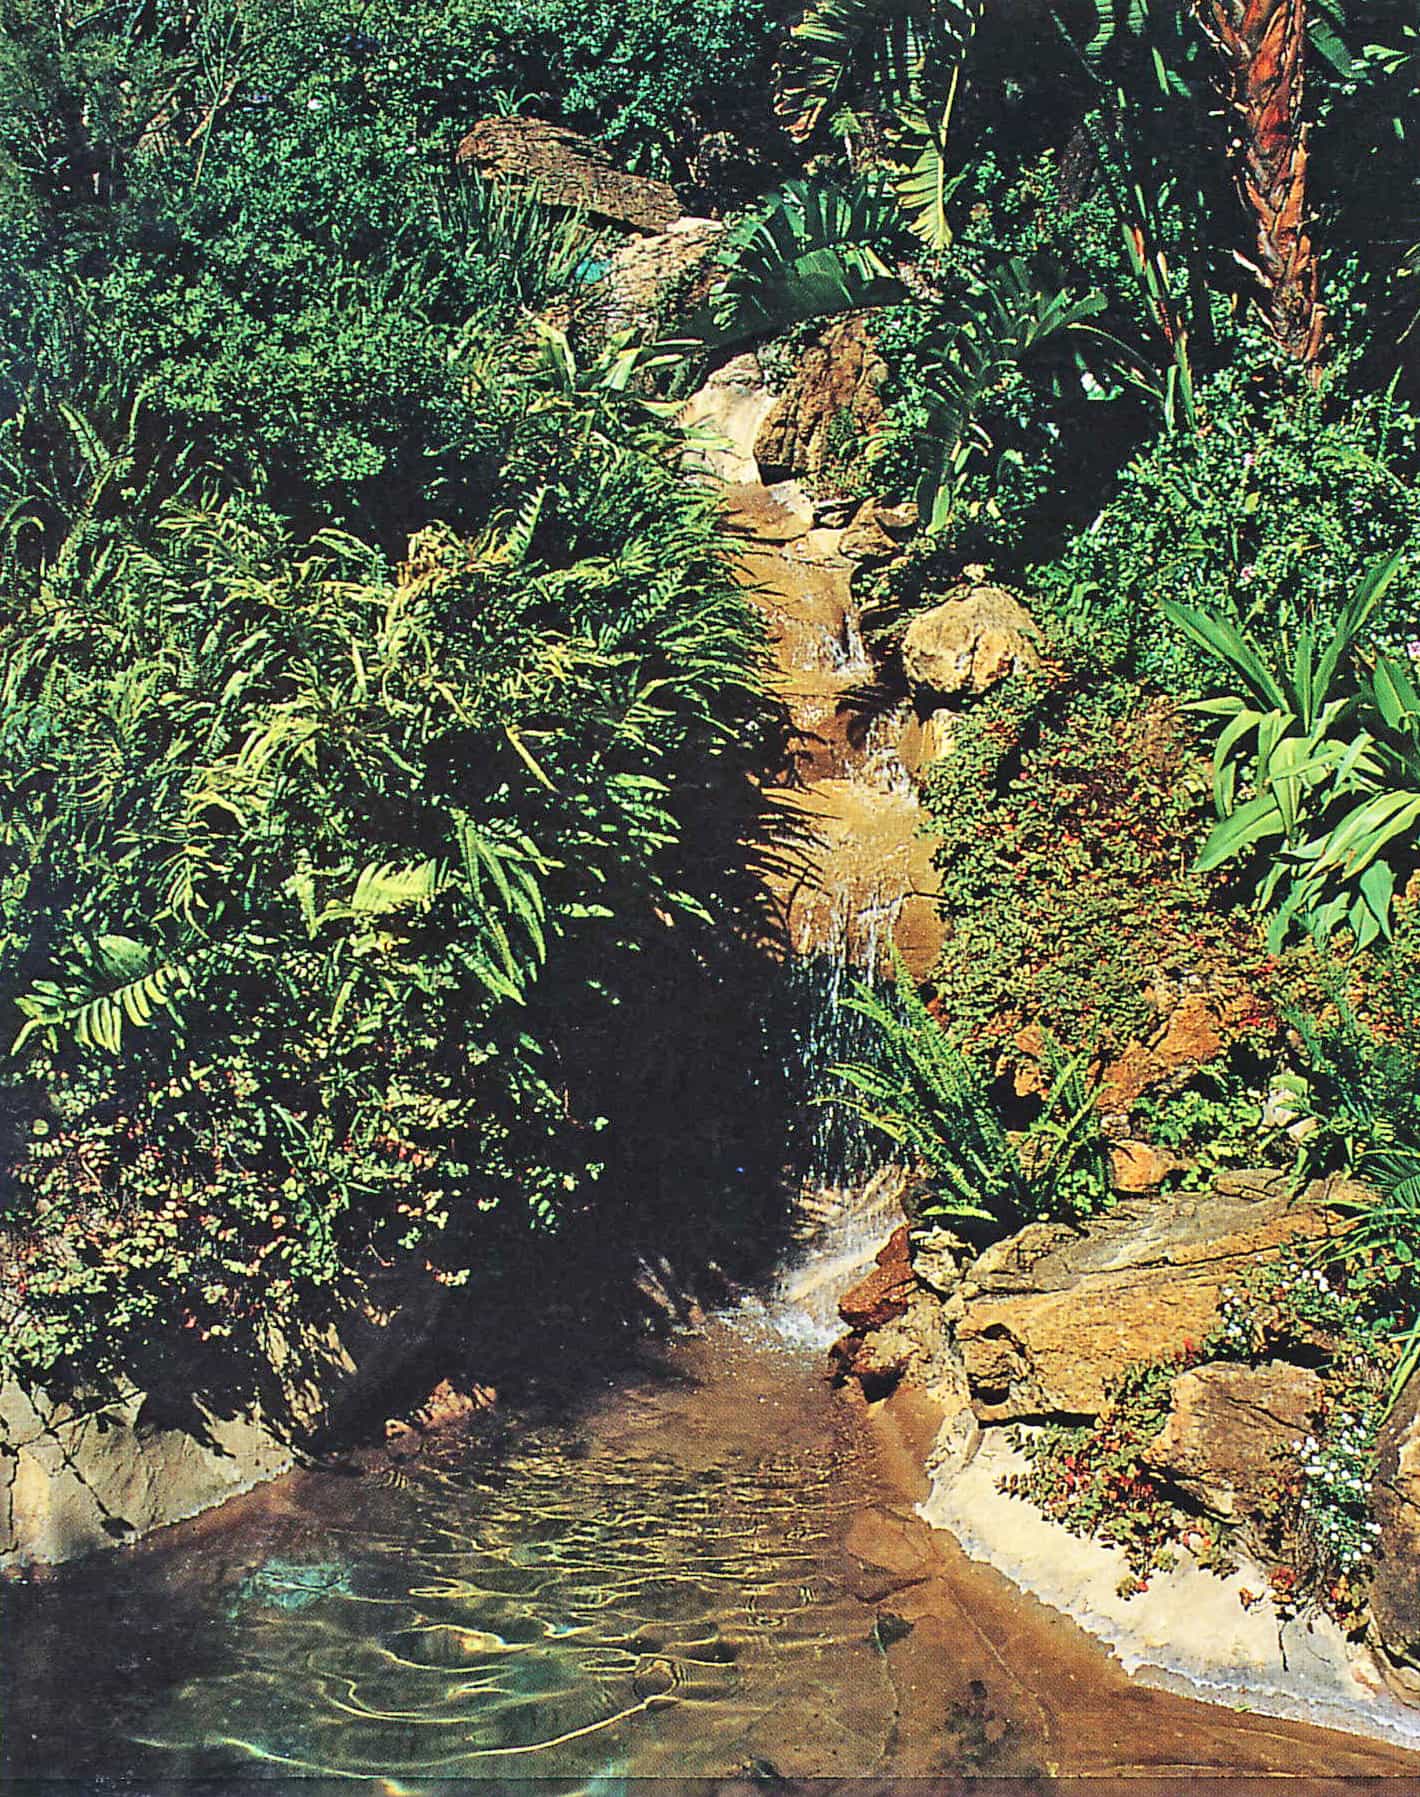
Concrete pools may be hand-packed or made by pouring the mixture between shuttering. Whichever method is chosen, there are certain basic principles which should always be followed regarding the mixing, laying and curing of concrete
If you are building a large pond with concrete, it is advisable to consult an engineer for advice regarding the stresses that the pressure of water will create.
Batching is essential for mixing concrete in the correct ratio. For DIY projects, the simplest and most effective way to batch materials is by volume, using the same size container for each component. Fill the vessel flush with the rim and, if possible, use a whole sack of cement for each batch.
When employing unskilled labor make sure that the correct ratios are used. A common mistakes the assumption that 1 bag of cement mixed with three, four or six wheelbarrow loads of sand is a 1:3, 1:4 or 1:6 mix. This is wrong, since a builder’s wheelbarrow can hold about two 50 kg (110 lb) pockets of cement and you will end up with a mixture which is far too weak for pool construction. If you are using a waterproofing additive, follow the manufacturer’s instructions carefully.
[ninja_tables id=”2193″]
Mixing concrete takes effort rather than skill. For small projects, it is common to mix by hand, in which case you will need a clean, hard surface, or a wheelbarrow. Never mix directly on the ground as water will be absorbed from the concrete and soil will contaminate it; and do not be tempted to mix on existing paving as it is very difficult to clean.
Start by mixing a batch of sand and cement together and then form a hollow in the center. It is not necessary to measure the water; use a garden hose to pour it into the center very slowly, shoveling and turning the dry materials as you do so. It is best to add water bit by bit, scooping the mixture from the outside to the center, until it is soft and workable, but not runny. Add the stone last, with more water if the concrete mix is too dry.
If you decide to go the less strenuous route and get a concrete mixer, this is one we have found that has some great reviews
If you decide to use a concrete mixer, the above procedure is reversed, with the stone and a little water being added first to prevent the mortar clogging the blades. Then add the sand and cement with more water to obtain the correct consistence.
Placing concrete in foundations directly against the ground, can result in some loss of moisture. To minimize this, dampen the soil in the foundation trench first, and allow the water to soak in before laying the concrete.
Once it has been placed, the concrete must be well compacted or vibrated to get rid of all air bubbles. With a straight-edge or wooden beam, use a chopping action to compact and a sawing motion to level. Finally, check the surface with a spirit level to ensure it is absolutely flat.
When hand-packing concrete to form an irregularly shaped pond, it is best to use a slightly drier mix and to angle the sides slightly outwards to prevent the mixture from sliding to the base. You should use some sort of reinforcing to hold the mixture in place and strengthen the shell. Weld mesh (or even galvanized chicken wire) is commonly used to line the excavation, ideally with spacer blocks made from cast mortar or timber, set between the soil and the mesh to help ensure that the reinforcing stays in the center of the concrete so that the shell is evenly strengthened. Most reinforcing mesh comes in a roll and you will have to cut it with a hacksaw and bend where necessary to fit the shape.
While the framework of a hand-packed swimming pool should be about 150 mm (6 in) thick, 80 mm (3 in) is adequate for most ponds. In cold climates, where frost is a problem, thicker shells with extra reinforcing is recommended.
To ensure the finished edges of the pool will be at the same level on all sides, mark a constant height with pegs around the perimeter before you start the concrete work. Use a water level to check their height.
The procedure of hand-packing concrete is basically the same as throwing a foundation, although you cannot use a straightedge for compacting and leveling the material. In this instance, it is best to use a round trowel, stamping the concrete to expel the air and level the surface with a float to smooth it off. Remove the pegs before the concrete sets and smooth over the holes.
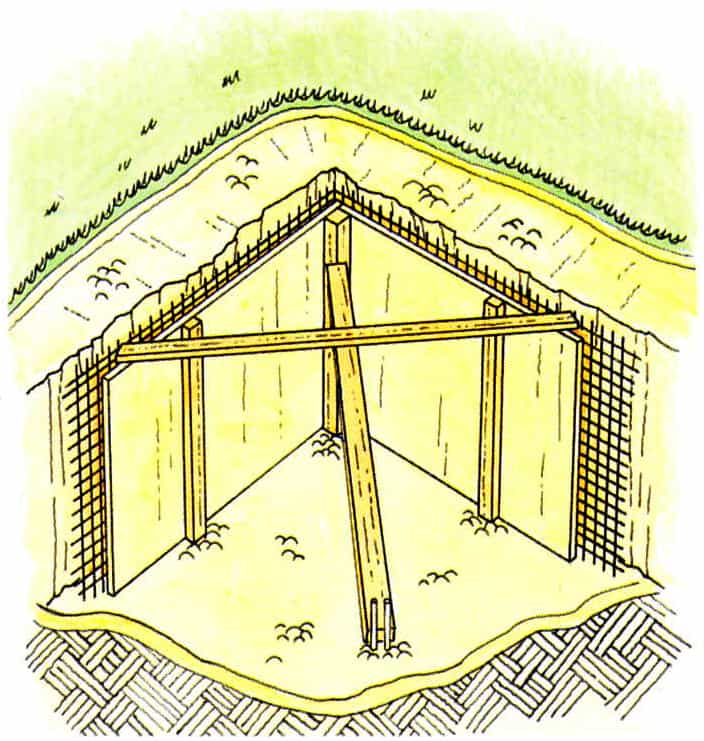
Shuttering is sometimes used in the construction of formal pools with vertical concrete walls. This is an especially useful method on a sloping site, or where a raised pond is required. It is also essential for the construction of concrete bridges.
The first step is to cast a slab or, in the case of a bridge, strip foundations on either side of the water. Once this has set, construct a strong, rigid form-work using timber boarding braced with wooden battens. The shape of the form-work, or shuttering, will determine the configuration of your structure. Since the form-work must be removed after the concrete has set, it is sensible to oil the form work lightly before pouring the mixture.
Position the reinforcing prior to erecting the shuttering, and only remove the shuttering after approximately 14 days, when the concrete is well set.
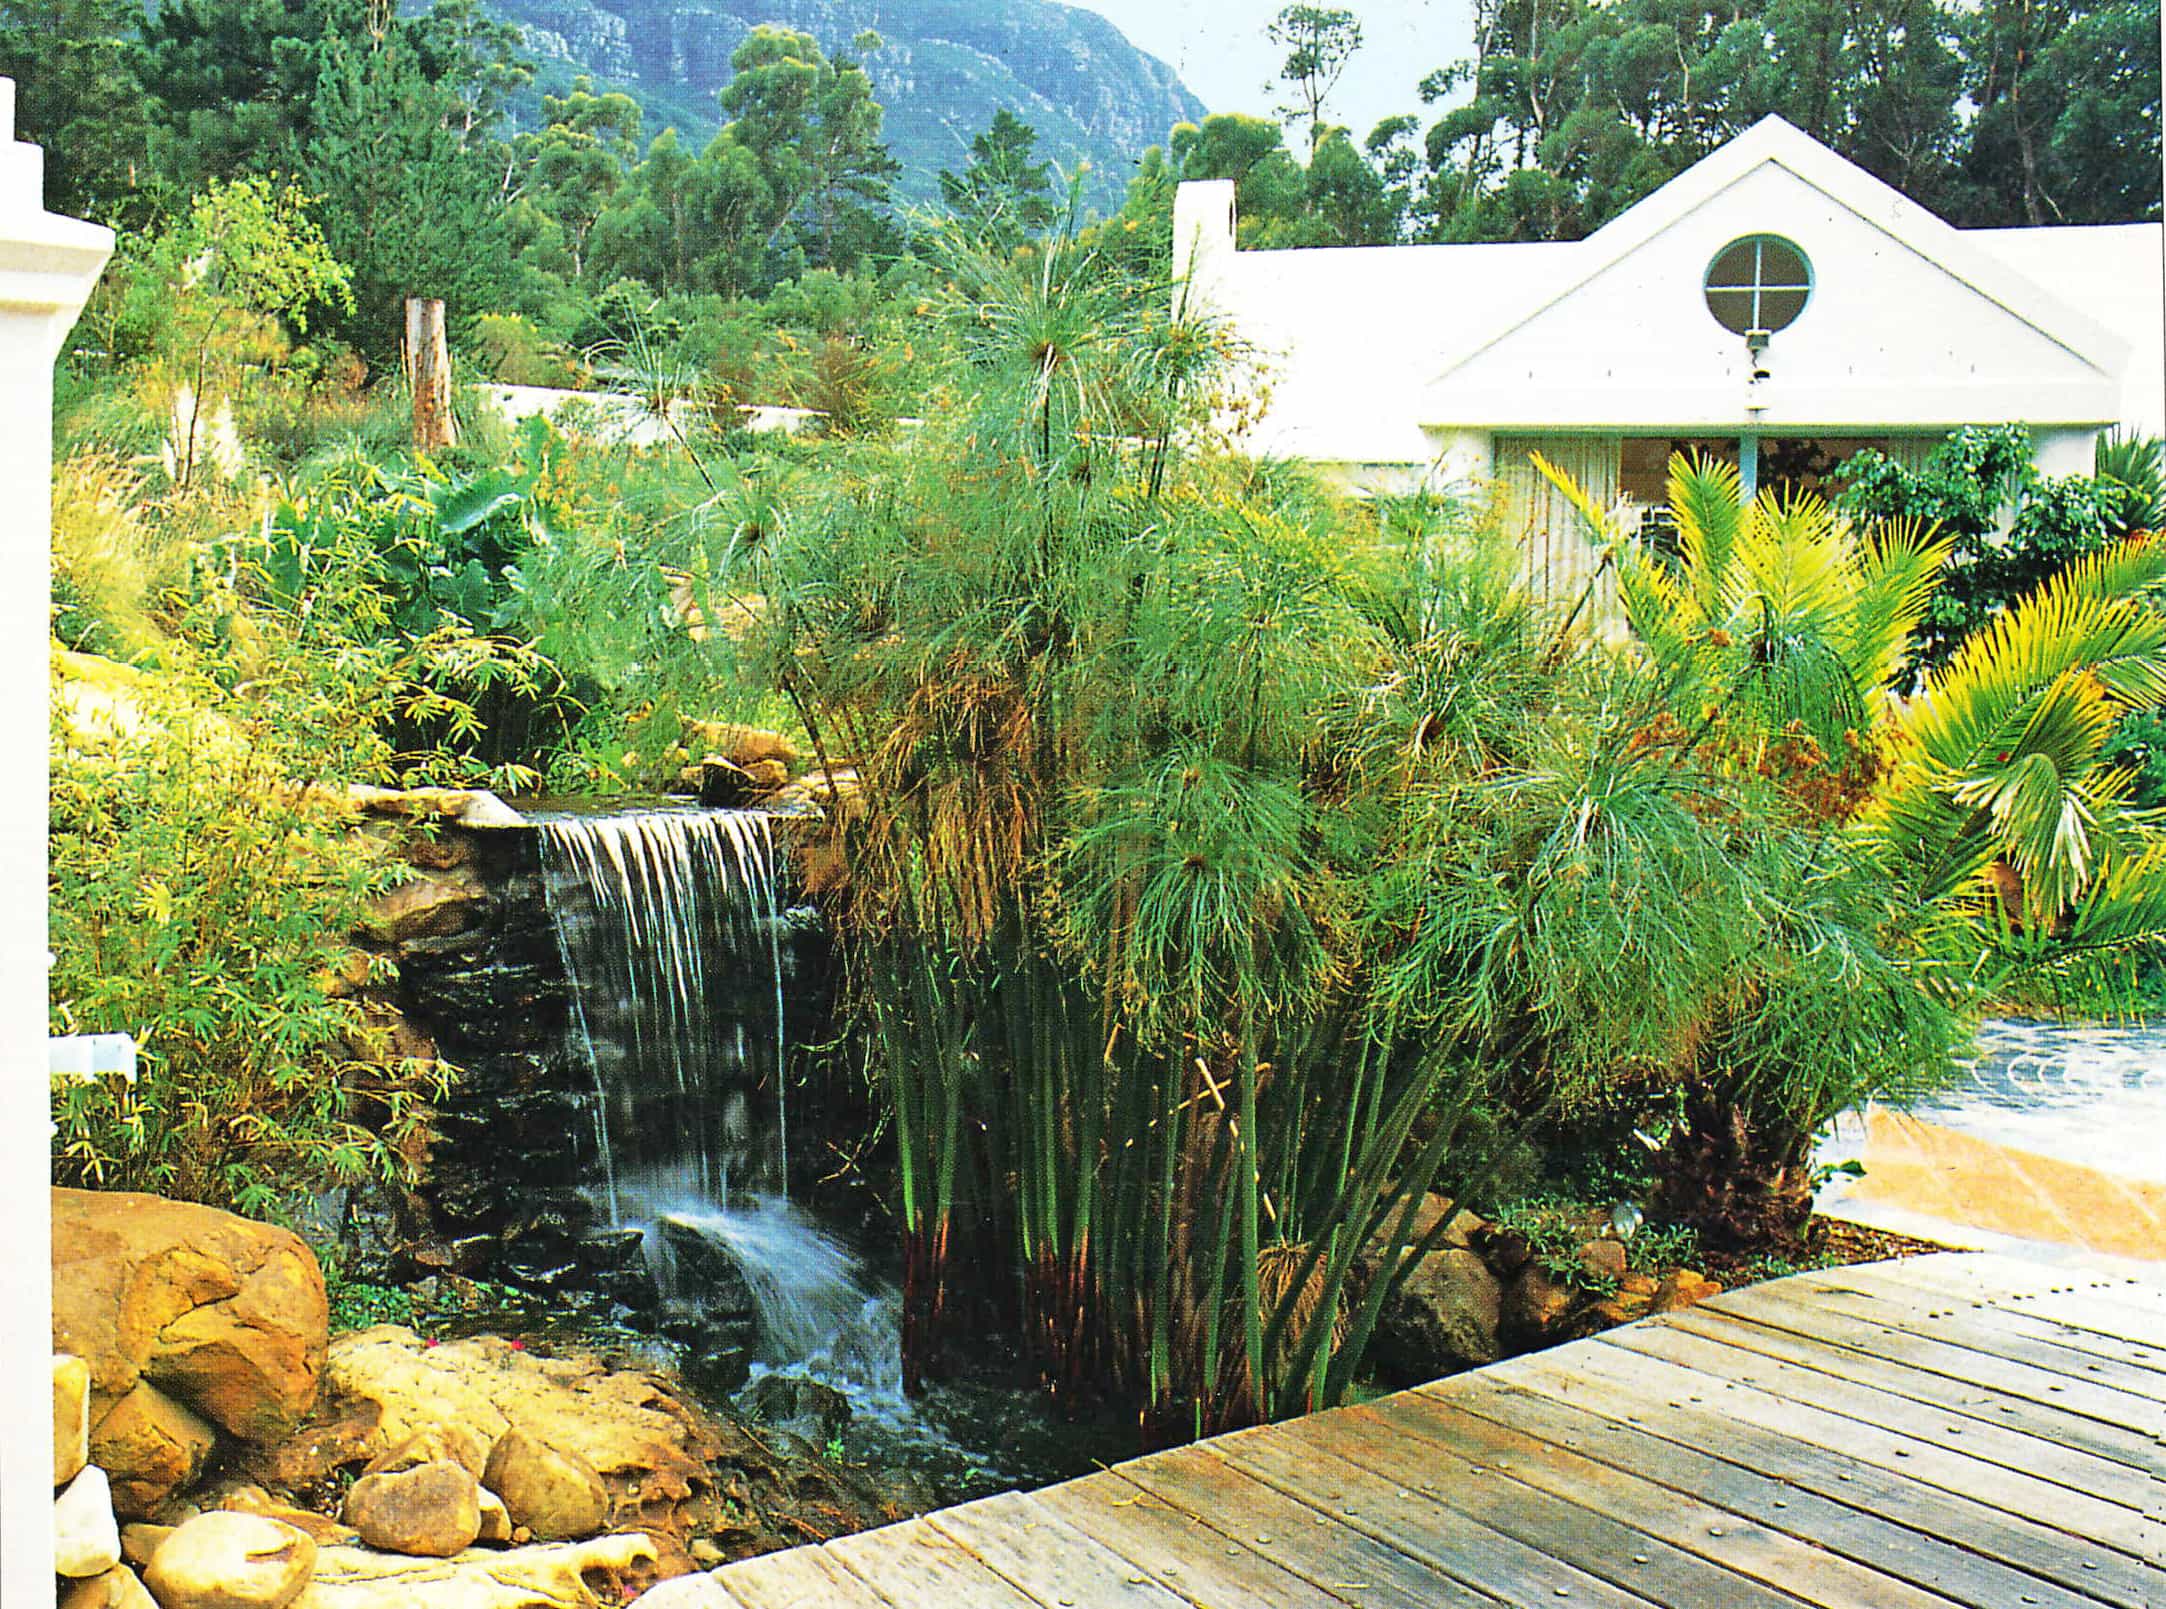
Curing is necessary for concrete to gain its maximum strength. Since it is the water which starts a chemical reaction causing the cement to harden, it is essential that sufficient moisture remains present in the newly cast material. It is important that the temperature of the concrete does not fall below 10 deg C (50° F). To aid curing, the concrete should be sprayed now and then with water; and in cold weather, it should be covered with sacking or black polyethelene to insulate it.
It takes about 28 days for the concrete to gain most of its strength; but, provided there is some moisture present, it will continue to strengthen for several years. It is important to realize that concrete does not get strong by drying out. In fact, if it is allowed to dry out too quickly, it can crack or even crumble.
Since ‘ponding’ water on the surface of newly-laid concrete will actually help it to cure, you can quite safely fill a pond after about 48 hours.
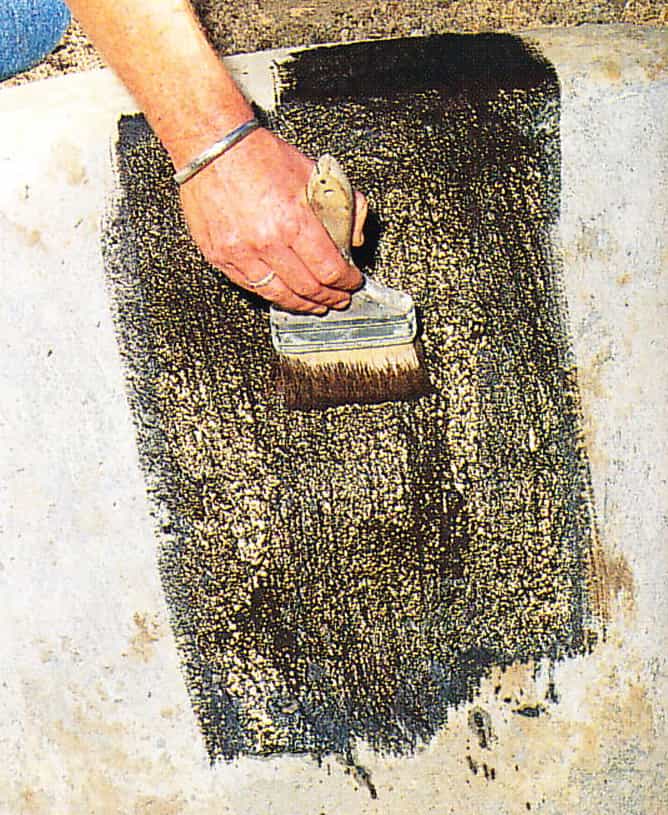
Finishes for the concrete shell range from render or plaster to waterproof bitumen. If these are disregarded, there is a good chance your pool will leak, even if you have used a waterproofing additive in the concrete mixture. At the very least, a slurry of cement and building sand should be rubbed over the surface. The koi pond featured here was rendered and then coated with a rubberized bitumen sealer. Other waterproofing possibilities are mentioned here.
Another factor to consider is that the inherent lime content of the cement, can be harmful to plants, fish and animal life. If you do not coat the internal surface with some kind of sealant, you will have to drain the water from the shell once or twice to rid it of any impurities. Each time you fill the pond, leave the water to stand for a couple of days so that it absorbs the lime residue. A commercially-available chemical lime neutralizer can also be used.
Bricklaying and Stonework
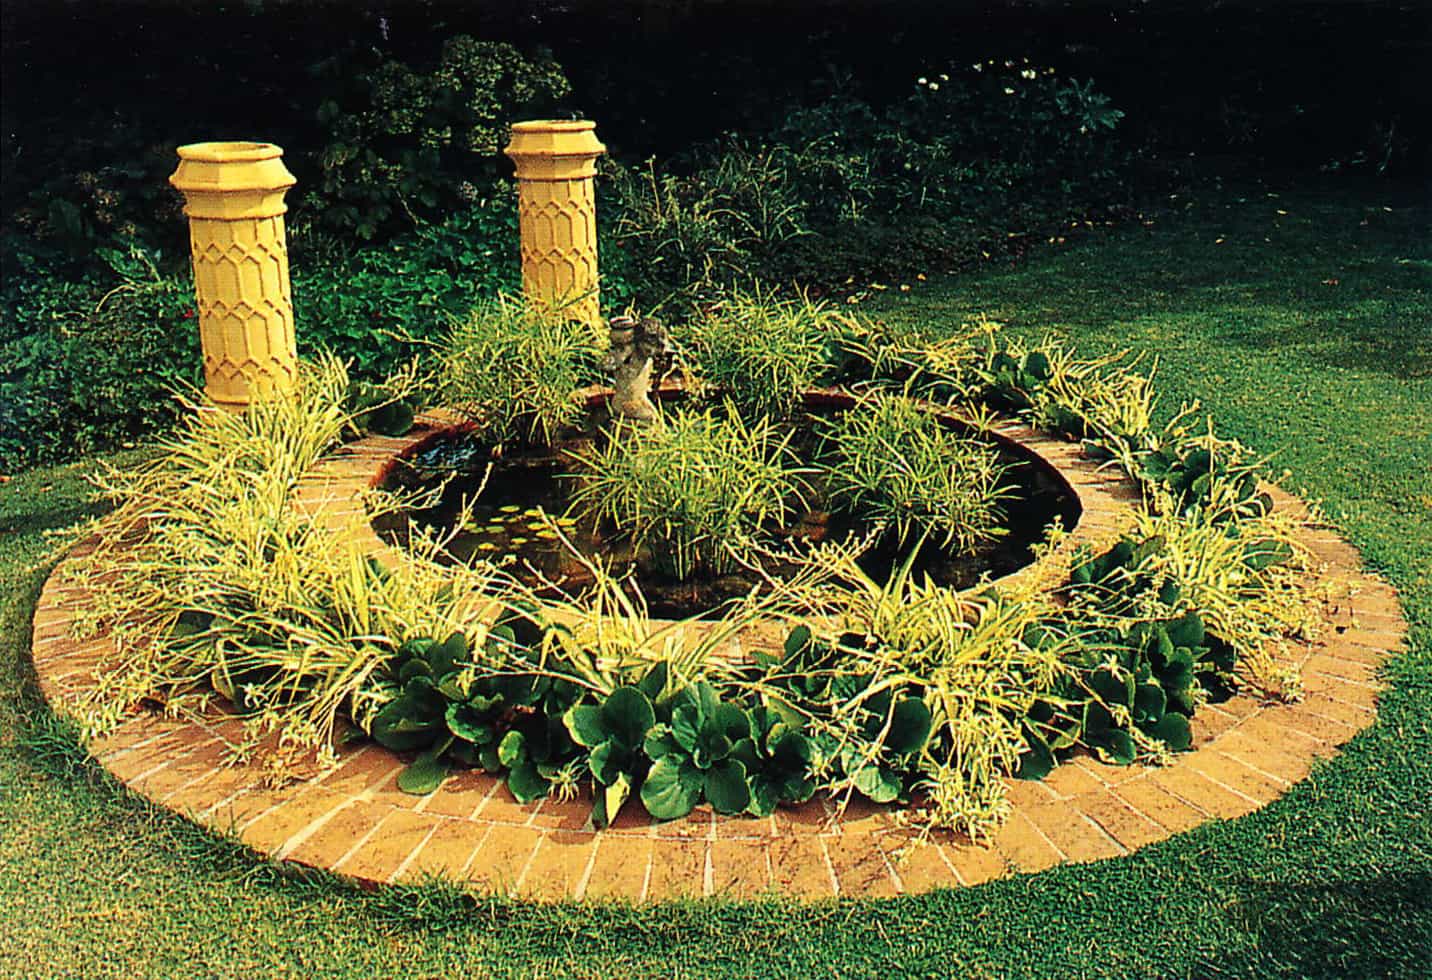
Even though bricklaying skills are not essential for the creation of ponds, raised structures built from brick or stone look particularly attractive, especially if they are formal in style.
Foundations are essential for all ponds and pools constructed with bricks, blocks or stone. While the required dimensions will vary depending on the height of the wall and other factors, a depth of between 100 mm and 200 mm (4-8 in) is ample. It is normally a good idea to cast a slab foundation which acts as the base of the pond as well as the support for walls.
The weakest spot in a pool built this way will be the point at which the floor joins the walls. As a safeguard, especially in deeper ponds, it is prudent to set reinforcing in the concrete and to build this into the brickwork.
Laying bricks is not particularly difficult, but it is vital to recognize the importance of the basic principles of square, level and plumb. A brick structure that does not stand upright and is not level, will look odd, and is likely to leak.
The tools required to ensure your structure has a really professional finish are a I detailed on this page, and the method of setting out a pond is described on these pages.
The next step is to practice using a trowel, since this important tool is used throughout the bricklaying process, you will need it to spread the mortar, to butter the bricks and bed them firmly into place, and to scrape off excess mortar.
Once the foundation has set, mix the sand and cement together with water in exactly the same way as for concrete, but without adding the coarse aggregate. The mixture should be reasonably thick and porridgy, and pliable enough to work with.
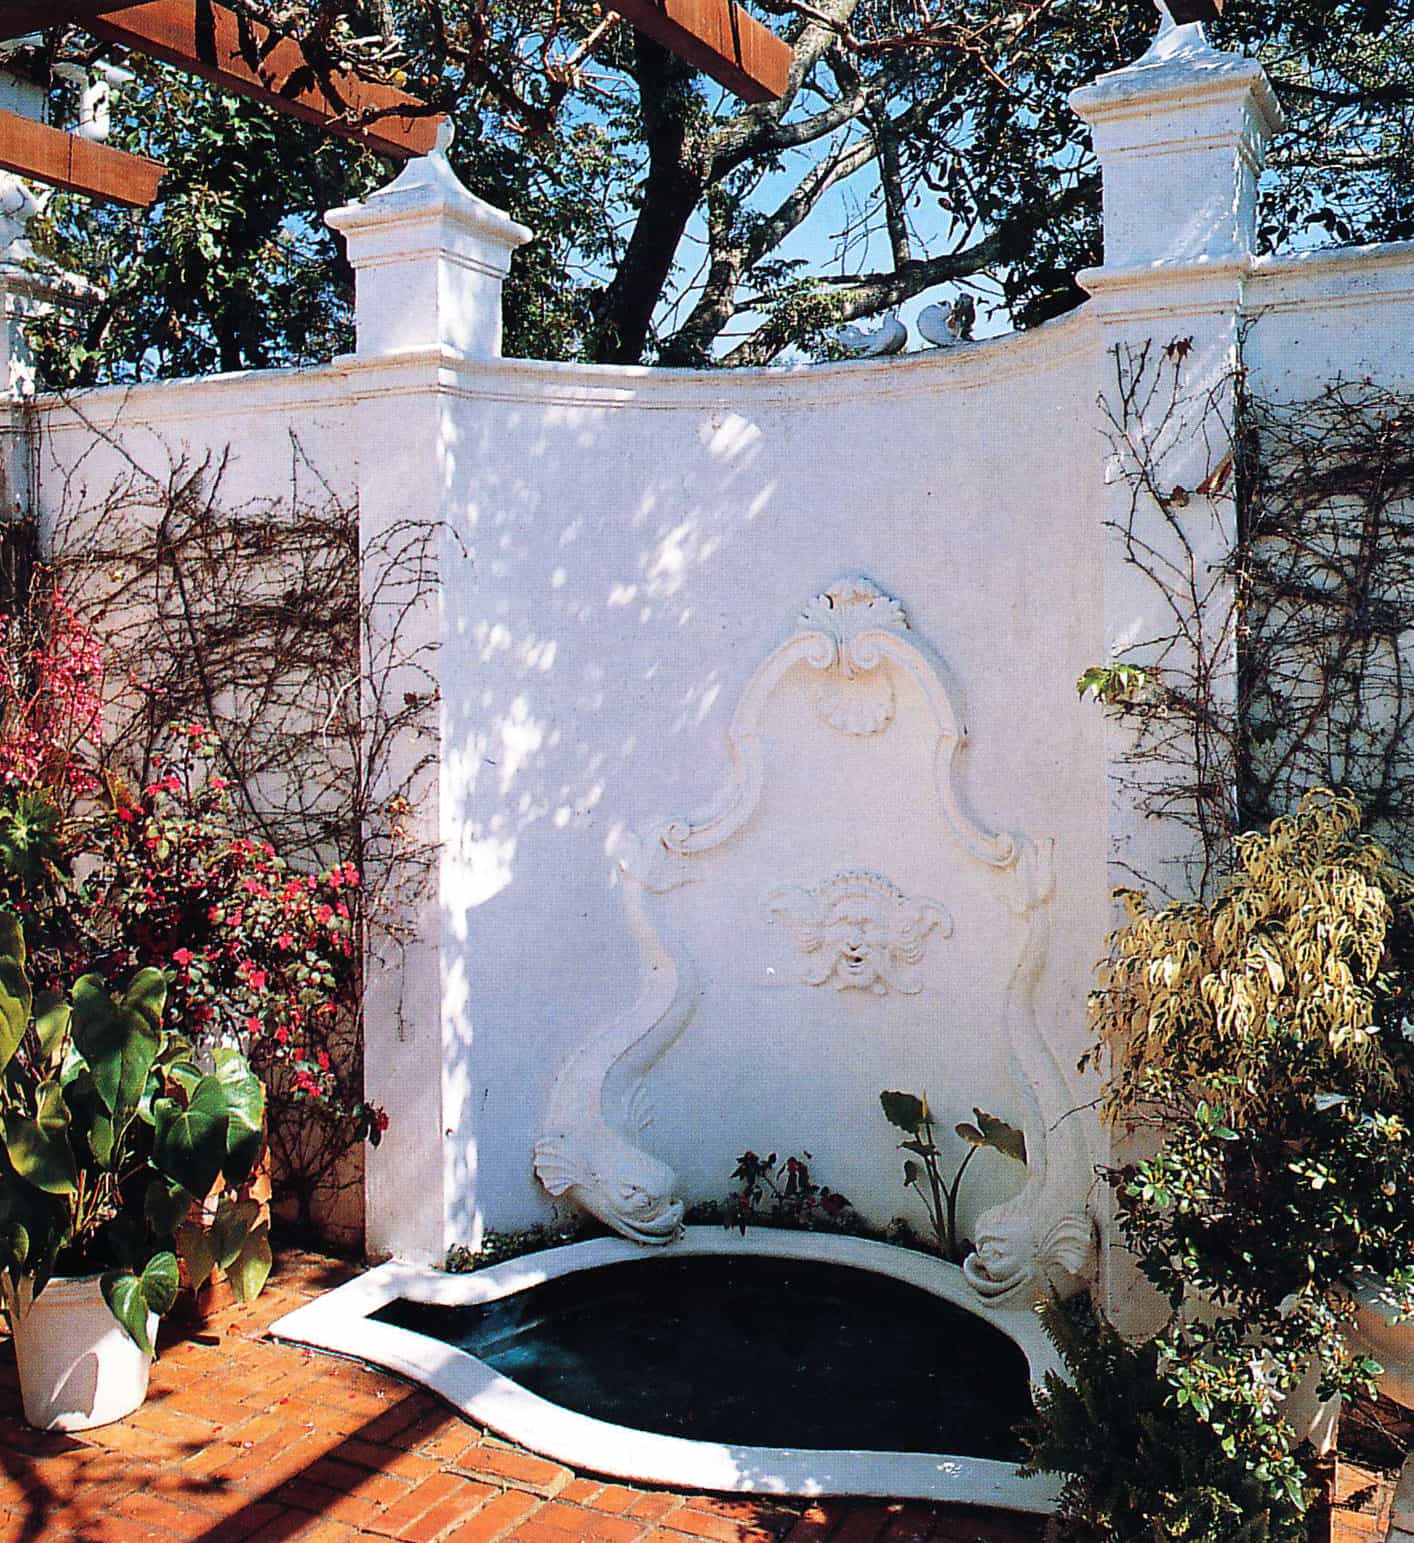
Lay mortar in a strip along the foundation where the brick wall is to be positioned, and use your trowel to create an uneven furrow down the center. Since the first course of bricks is the most important of all, it helps to string a builder’s line to check that it is straight. A steel builder’s square can also be used.
Begin bedding the bricks in the mortar, ensuring you have an even 7-10 mm (¼ in) joint between each. You can fill the joints after bedding the bricks, but it is easier to butter one end of each brick as you go. Do this by lifting a blob of mortar with the trowel and squashing it onto the short side of the brick. Slide the brick into position and then tap firmly with the handle of the trowel, to bed and level it.
Before starting on the second course, it is essential to check that the bricks you have already laid are level. From this point, corner blocks and a line may be used to keep each successive course straight; and a gauge rod, to ensure that mortar joints are even. A spirit level should be used frequently to check both horizontal and vertical brick surfaces.
Another critically important building principle to remember is bonding. If the load of the bricks is not properly distributed, even a low wall can collapse. There are various different bonding patterns. The most common type is stretcher bond, a pattern formed with each brick overlapping the one below by half.
As the brickwork progresses, use the trowel to scrape away excess mortar. This is especially important when using reconstituted stone or facebricks, although it will still be necessary to use a pointing tool or piece of metal to neaten the joints when building is complete.
Stonework is similar in many ways to brickwork. However, while brick courses are even, stone may be laid randomly or in courses with a regular horizontal joint and irregular vertical joint (cut stone).
A dry stone wall, built without any mortar, is obviously only suitable if it is designed to camouflage a rigid shell set above the ground. More commonly, stone is bedded in mortar, and the same tools used for checking levels and corners.
To simplify the task of waterproofing, it makes sense to aim for as even an internal surface as possible. For this reason, cut (or dressed) stone is an obvious option, even though it is not widely available. Unless you have the special equipment and necessary experience, it is usually best to employ the services of a stonemason or artisan with stone-cutting skills.
Rendering is a useful skill for pond builders to acquire, as a variety of brick structures are finished this way. The internal shell of concrete and stone pools may be rendered with a cement/sand mix.
The mortar mix – which can be exactly the same as that used for bricklaying should preferably contain plasticizer to make the material more pliable and therefore easier to spread over the surface.
It is applied to the brickwork or concrete shell with a rectangular or rounded trowel and pressed down so that it will adhere. The trowel is then used to scrape it flat before it is smoothed with a wooden float. In hot weather, it helps to splash a little water on the render as you work. Finally, corner trowels are used to neaten edges of both internal and external corners
External plaster or render must be kept damp in exactly the same way as concrete, to ensure it cures and does not crack. It may, however, be painted with a rubberized bitumen within a relatively short period of time.
Tiling and Paving
Two of the most obvious options for a pool or pond surround are tiles or paving. The basic principles involved are much the same for all these related materials, although the preparatory work does vary from project to project
Tiles must always be laid on a solid base, and you will therefore first have to throw a concrete slab. If you are going to bed them with a cement-based tile adhesive, you will have to screed the surface with mortar. Some tiles, including the terracotta type, may be laid on a bed of mortar set directly on the concrete.
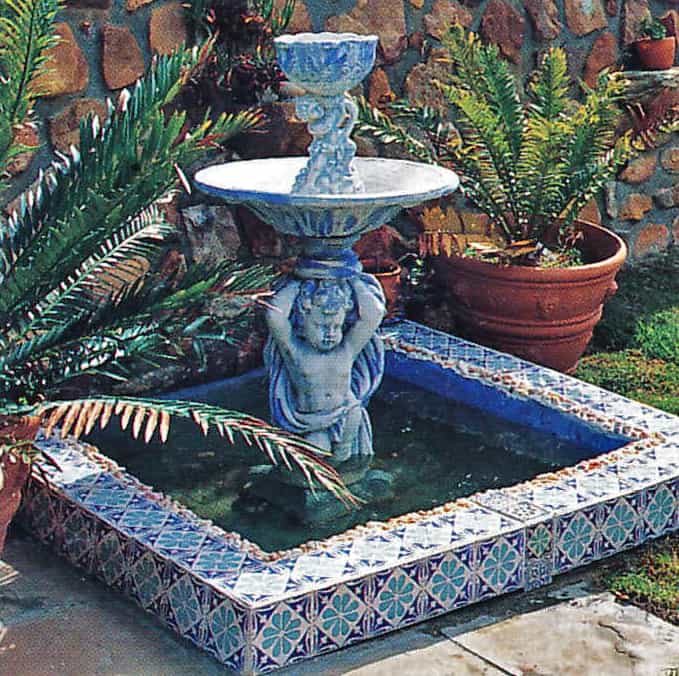
After approximately 72 hours, once the screed has set hard, mix the tile adhesive according to the manufacturer’s instructions. This product is spread with a notched trowel which forms ridges to aid adhesion, and the tiles are then pressed firmly into place.
A steel square and a straightedge will enable you to lay tiles at the required angle, and spacers (made of plastic or metal) will guarantee equal joints. Use either a line or a length of string to mark the edge and secure each end under loose tiles or bricks. A rubber mallet is the best tool to tap the tiles so that they are level. Simulated stone designs and some handmade quarry tiles are slightly uneven in thickness; use a spirit level to check that the upper surface is flat. lf any of the tiles are lower than the others, lift and spread a little extra adhesive on the base of the unit.
Laying tiles on an adhesive layer is generally less messy than laying them on a bed of mortar. However, in both cases, these materials should be wiped off before they dry and stain the surface.
If you are going to do any tiling it would be wise to get a proper tile cutter, here is one that will do the job for you
Grouting is done after about 48 hours, when the adhesive is dry or the mortar has set. Use ready-mixed grout or mix the powdered type with water, according to the manufacturer’s instructions, and spread thickly over the joints. All the excess should be wiped off immediately with a sponge, especially if you are using very porous tiles.
Tiles that have been laid on mortar can be grouted with a 1:3 cement and sand mixture. When mixed with water, it should be fairly dry and crumbly. A small pointing trowel may then be used to fill and smooth the gaps. Any mortar staining the tiles should be wiped off immediately.
Paving may be laid on concrete, but it is more usual to lay bricks, blocks and slabs on sand. Not only is the second option quicker, but it is also cheaper.
If the ground is unstable, you will need to excavate 100-200 mm (4 in-8 in) to accommodate a sub-base of crushed stone or gravel before spreading the sand. This should, in turn, be thoroughly compacted, by hand or machine.
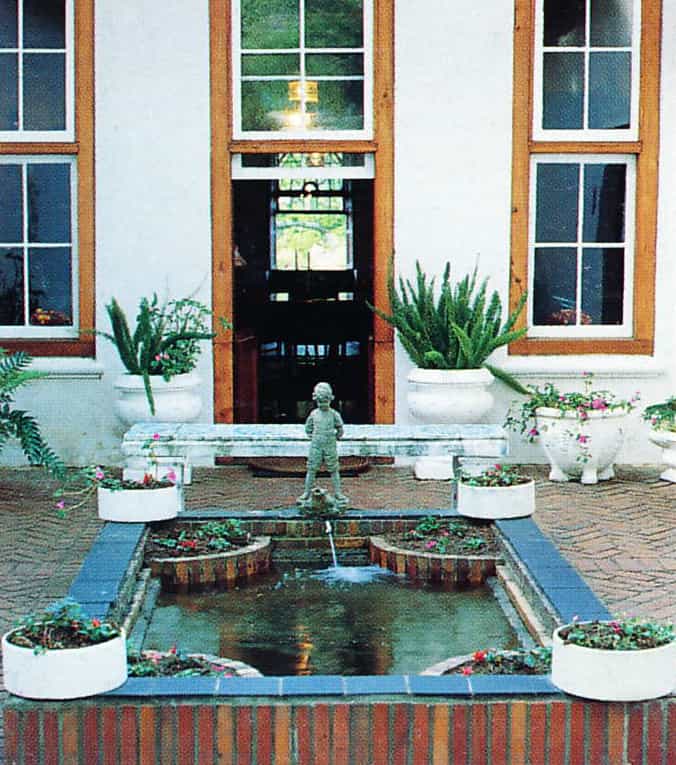
When laying any form of paving directly on the existing ground surface, remove all vegetation before compacting. The layer of sand should be no more than 30 mm compacted to 25 mm (about 1 in), and it should never be used to level uneven ground. Smooth it with a straightedge before you start laying the bricks, allowing a slight slope for drainage.
Pavers may be laid in a number of patterns, and the joints filled with sand or a weak mortar mix. A steel square, spirit level and builder’s line will assist in producing a professional finish. A rubber mallet is useful for tapping the pavers into place.
The recommended cement:sand mix for jointing clay bricks laid on sand is 1:6, while a slightly stronger 1:4 mix should be used when jointing pavers, flagstones and setts made from concrete, or clay bricks which have been laid on a concrete base. Either brush the material in dry and afterwards spray the surface lightly with water; or alternatively, use a trowel to fill the gaps with a crumbly mix.
Cutting tiles and bricks can be a wasteful business; however, it is one of those inevitable tasks which must be tackled. Using a bolster and brick hammer is relatively simple, once you get the knack. Place the brick on the ground, preferably on a thin bed of sand, and then use the chisel end of the bolster to score the surface on all sides. Position the bolster on the cutting line you have made and tap the handle end firmly to break the brick. Another method is to score a cutting line with the chisel end of a brick hammer, and then continue tapping around this line until the brick breaks.
When tiling, special cutting machines which score and break the tile are useful, and certainly more efficient than using a manual scribe and nippers. Thick quarry and terracotta tiles should be cut with an angle grinder using the appropriate disc.
Edging and coping
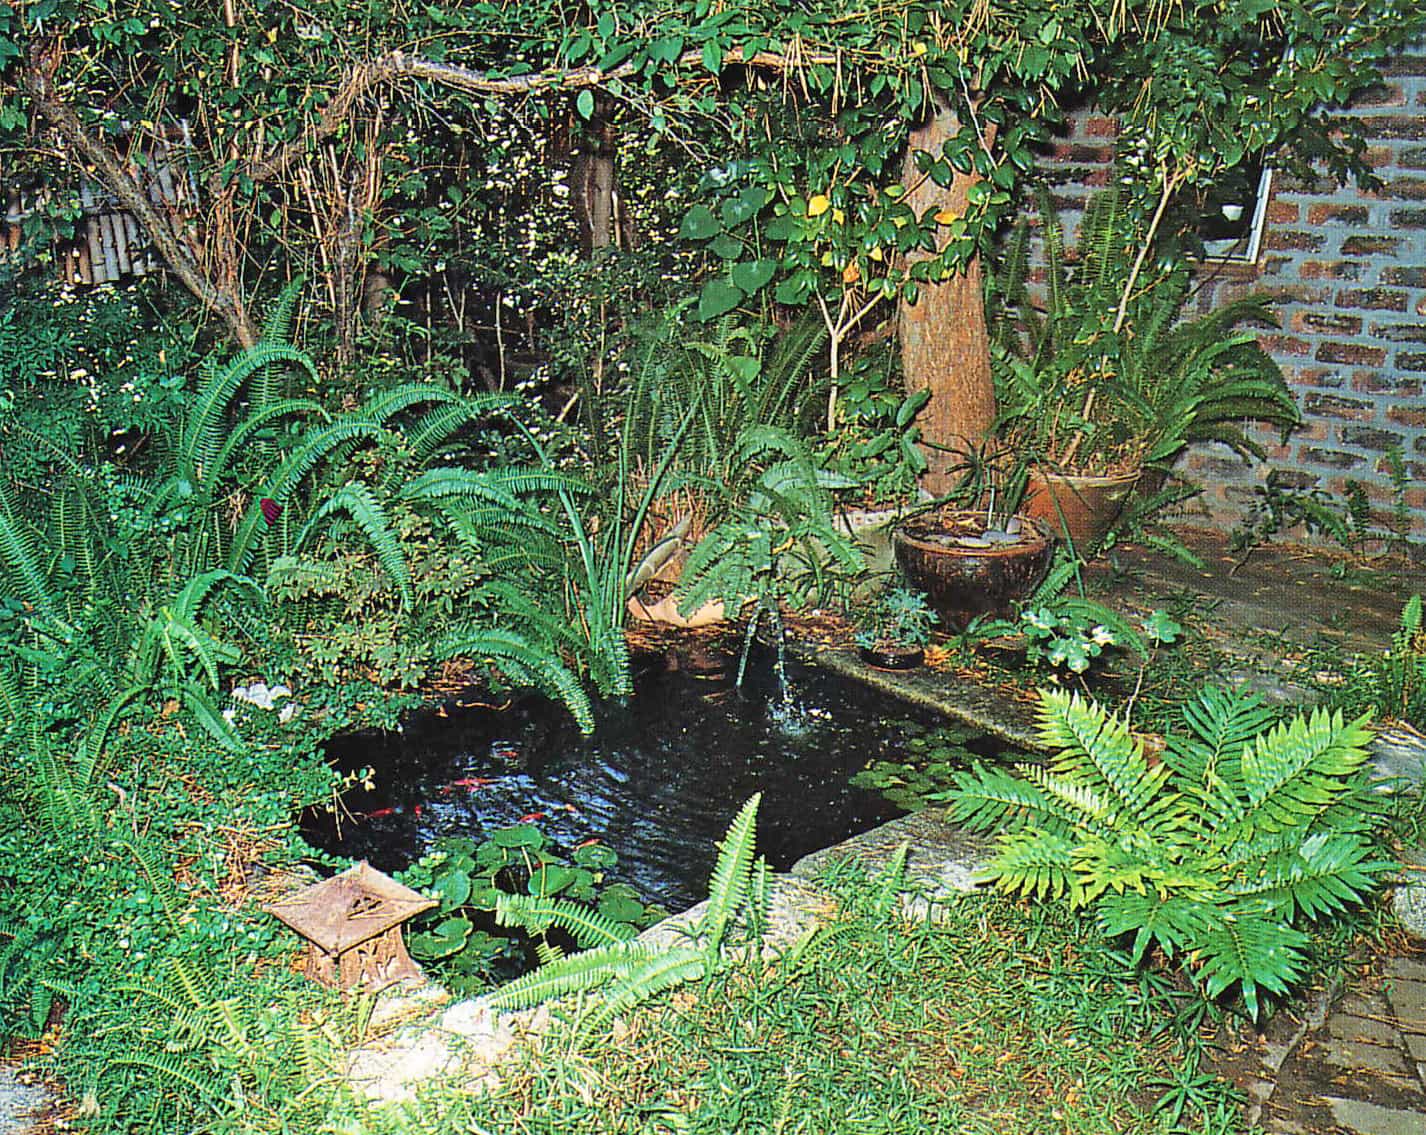
The principles involved when laying any kind of edging are dependent largely on the materials used; and this, in turn, will depend primarily on the type and style of pond or pool you have built. For instance, grass may be allowed to grow right up to a clay-puddled pond, but it is inadvisable as an edging for a liner pond where any erosion of the bank could be disastrous. Tiles or brick paving look beautifully sophisticated laid around a formal, symmetrical pool, while rocks, stone slabs and even timber will be more appropriate if used to edge a natural pond. A coping will only be necessary around raised pools, to finish off the supporting wall.
Edging around any water feature will be one of the final tasks of any project. There are various options and, except for raised decking erected alongside the water, it is important for all types of edging and surround to be laid on a soil bed that is sound and well compacted.
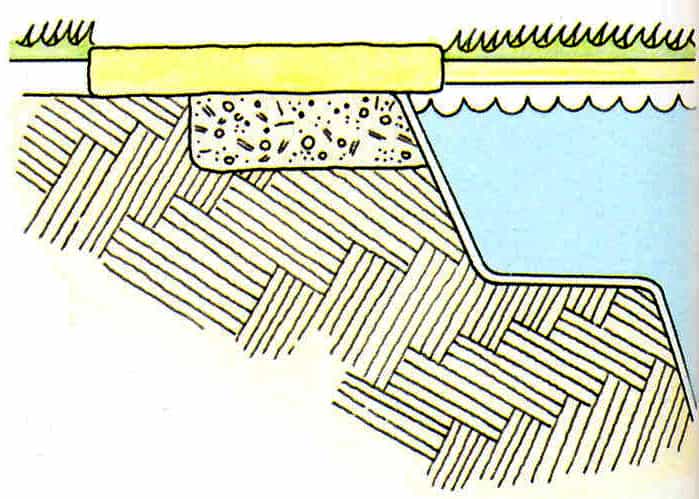
Although not always necessary, a collar of concrete laid around the perimeter of the feature will stabilize the edging. Where bricks are used as an edging around pools they should be securely set in mortar to ensure they do not come loose.
Slabs, bricks and even tiles may be laid to overlap the edge of the water slightly. This hides the shell and, in the case of polyethylene and PVC, protects it to a certain extent. By sloping these away from the water very slightly, excess water and mud can be prevented from washing into the pond in rainy weather.
When laying the edging, a common problem is that excess mortar falls into the pond. Not only is this messy, but lime in the cement damages plants and can kill fish. For this reason, it is essential to clean the shell before filling the pond. If it is already full of water (which will be the case if you have fitted a flexible liner), then drain and clean it before introducing any type of pond life.
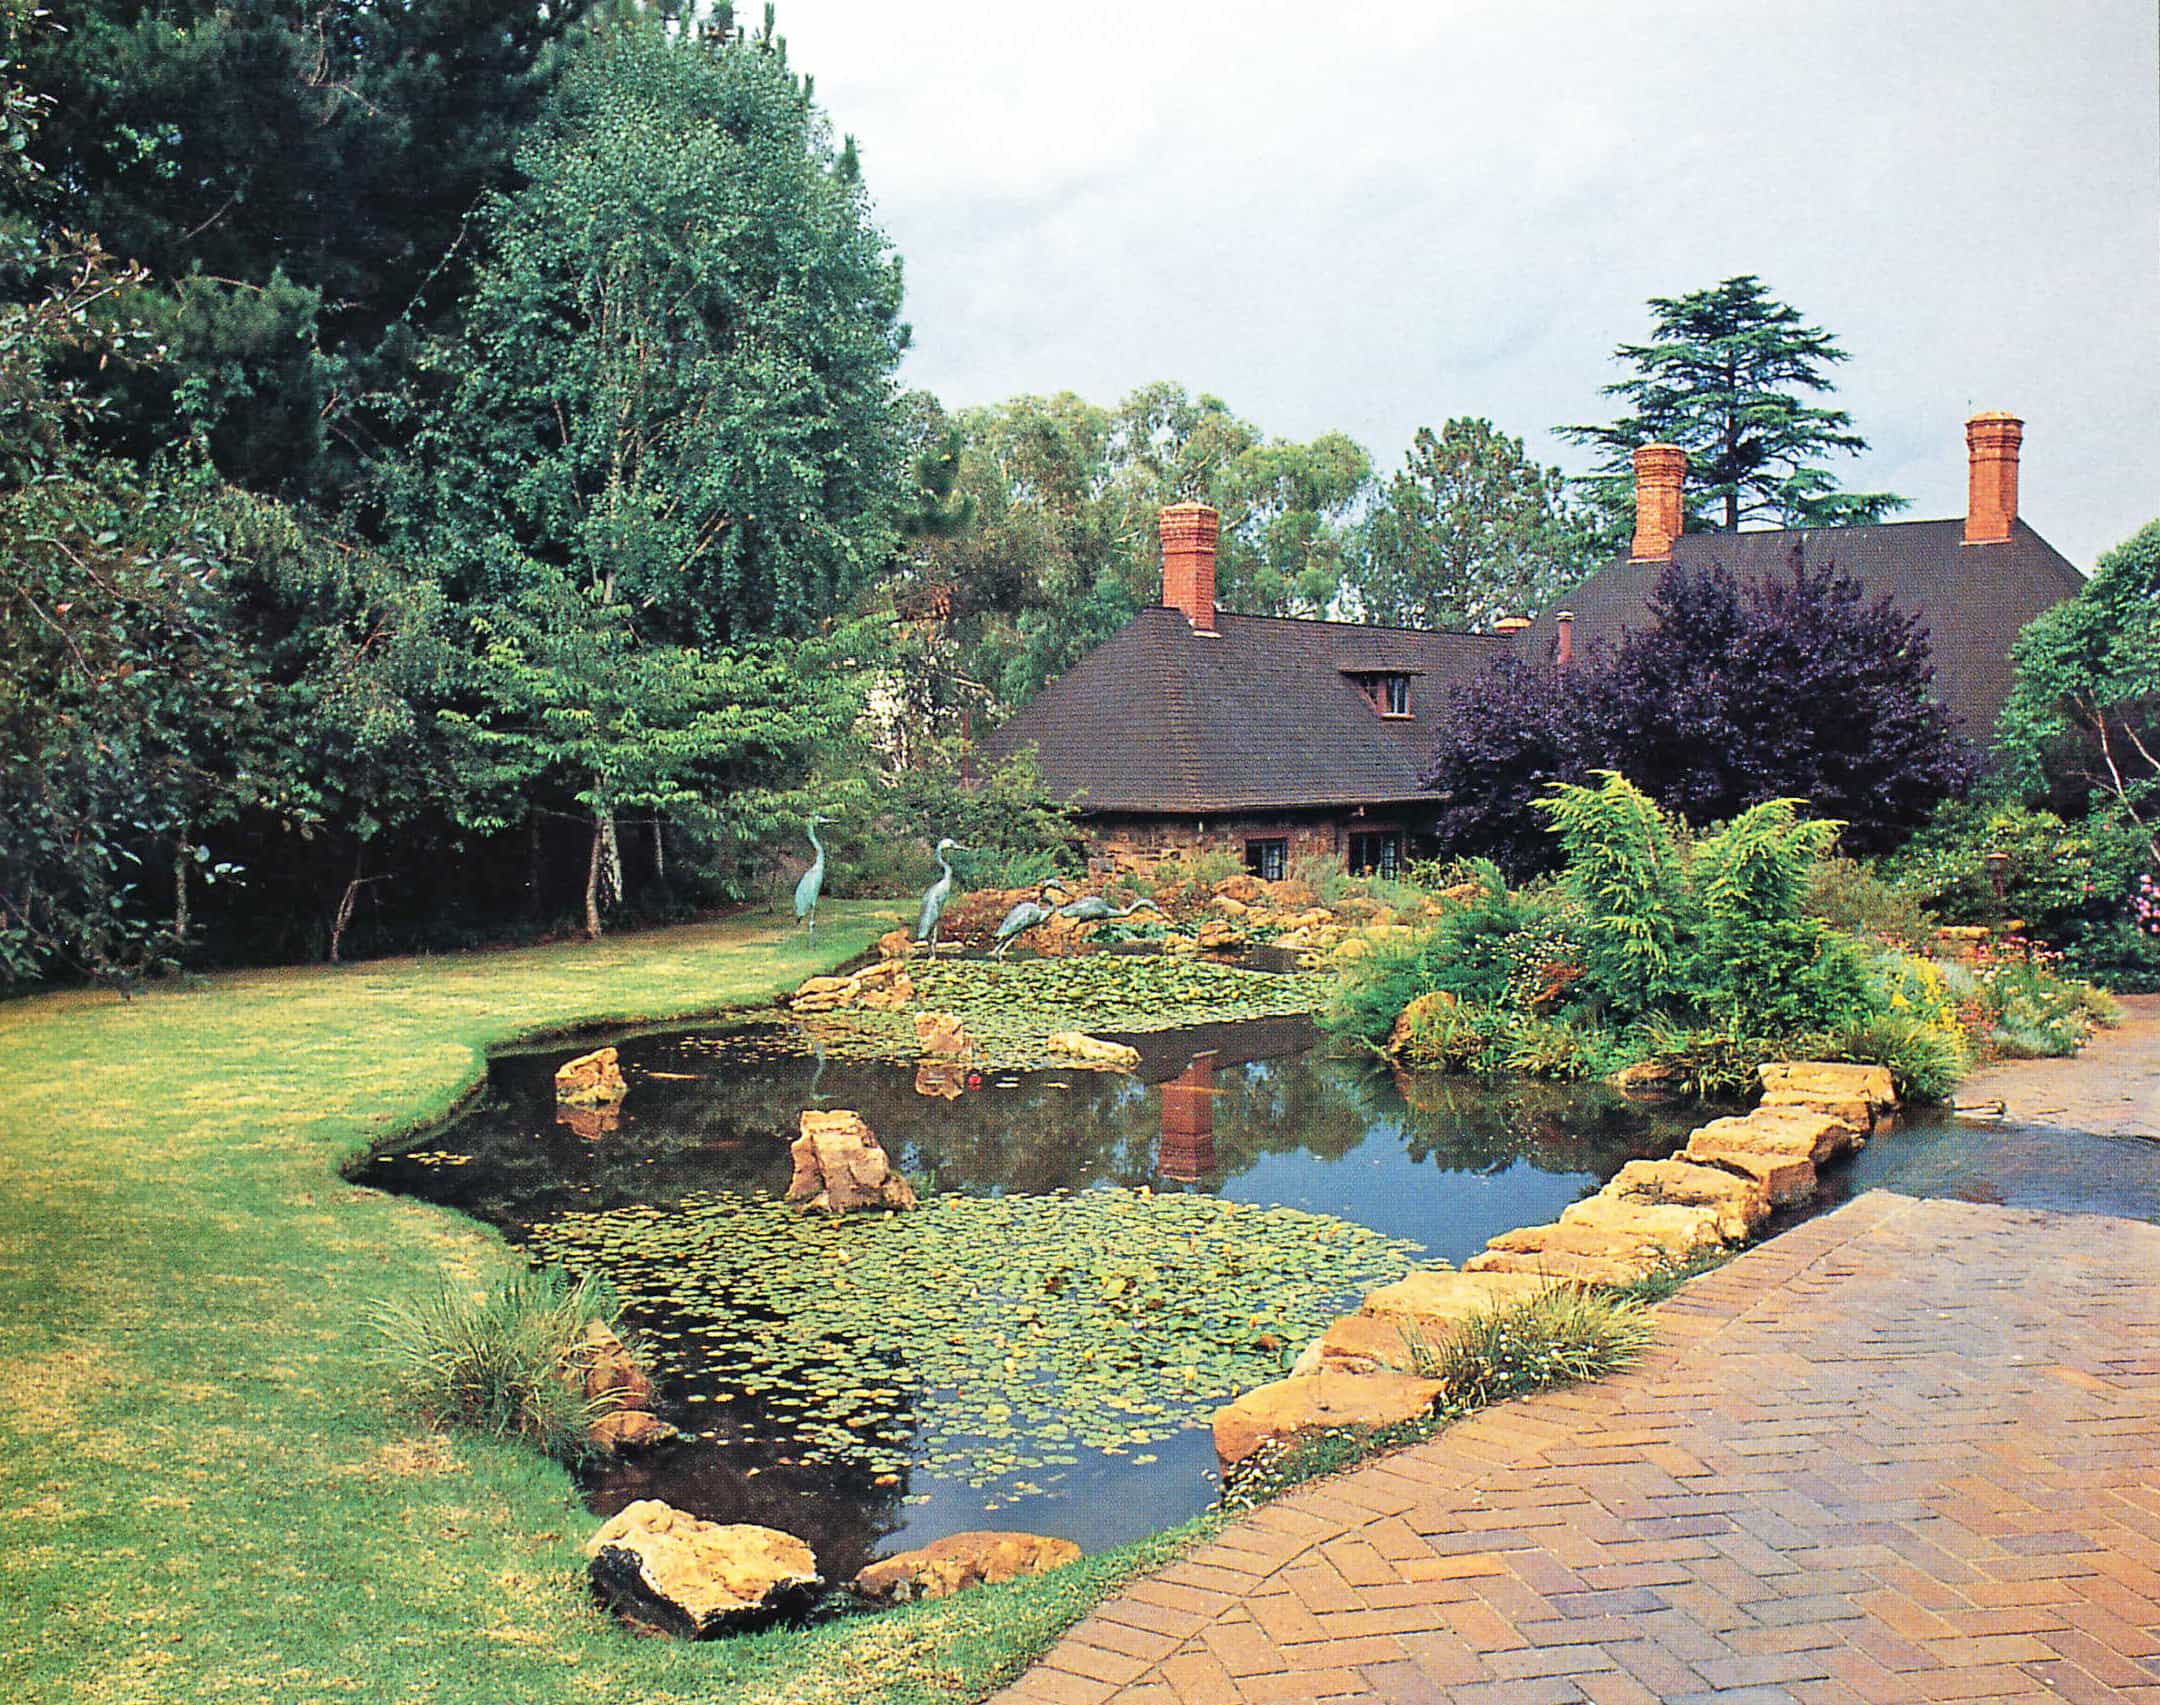
Coping will finish off any raised pond or pool. Various materials are suitable, including paving bricks, tiles and simulated stone slabs. Either match the coping to the wall – topping a facebrick structure with matching paving bricks, or use a contrasting material – perhaps tiles on a rendered wall, and timber atop dressed stone.
Most materials will be cemented into place, although it may be necessary to bolt timber to stabilize it. The upper surface of stepping stones may be finished in exactly the same way.
Woodwork
Only the most basic carpentry skills are needed for the average water garden project. Provided one knows how to use the necessary tools – drills, saws and so on – simple decks, jetties and even bridges may be tackled by enthusiastic amateurs.
You will, of course, need to know how to cut and join timbers competently, and which connectors to use to secure them. There is no need for elaborate joints in garden structures, and most of the time you can rely on the simplest arrangement which may be nailed, screwed or bolted.
Cutting timber across the grain is the normal procedure for this type of woodwork. This may be done with a tenon saw, hand-held power saw or a circular bench saw, which is what most professionals would use. You will need to secure the timber to get a clean cut, preferably by clamping it to a workbench. You will usually saw the ends of beams, railings and so on perfectly square; when you miter corners, however, it will be necessary to make an angled cut.
Joints, as already mentioned, are essentially simple. The main intention is to keep them neat, safe and secure.
Even a reasonably large deck can be built with ordinary butt joints (where two pieces of wood are joined without any fancy cutting), some of which may overlap to form a T- or cross-lap joint, and other elementary connections. These include lapped joints, used to lengthen pieces of timber, and half-lap joints where two pieces of wood are cut out so that they slot together snugly to form a beautifully flush surface. Both half-lap and mitered joints may be used to create neat corners (see illustrations below).
 Securing the connections is quite elementary, and a variety of nails, screws and bolts may be used. The secret is knowing which item to use where.
Screws & Nails
Wood screws are the most common choice for carpentry and it is important to choose the right one for the job. Coach screws, which have a hexagonal head and are tightened with a spanner, are particularly useful for garden structures. Most screws are partially un-threaded, but self-tapping screws have the thread right up to the head, giving a better grip. They may be fixed with a screwdriver or a drill, and are often used to secure decking slats and handrails for bridges. Self-tapping screws can be screwed directly into softer woods, but to prevent the wood from splitting, it is best to drill a pilot hole, thinner than the screw itself, before you begin.
Where timber is attached to masonry or brickwork, special expansion bolts (called Rawl bolts) are invaluable. Hexagonal bolts, which, like coach screws, are tightened with a spanner, and cuphead or coach bolts, may be used to affix heavy beams and upright timbers used for decking and pergola structures.
Nails are easily hammered into timber, but they sometimes pull out easily. In general, longer, thicker nails will be more secure than short, thin ones, although you must take care not to split the wood. Ideally, a nail should be more than double the thickness of the wood you are fixing, To strengthen the join, first glue the two pieces of timber. Dovetailing the nails, by hammering them in at an angle, will help prevent the wood from twisting. While wire nails are used for rough carpentry, ring-shanked nails have a good grip and may be used when fitting decking slats.
When nailing very hard woods, it helps to drill a small pilot hole first; and when nailing soft timber, it is best to blunt the tips of the nails slightly to prevent the wood splitting.
The cheapest nails and screws are made of steel, but this material will rust unless it has been anodized, galvanized or coated in some other way. Where ordinary steel is used, it is best to countersink screws just below the surface and fill up to surface level with a filler. Nail heads can be hidden by prizing up a sliver of wood before hammering the nail into place, and then gluing the bit of wood back in place.
Finishing Off
Finishes applied to timber are as varied as the wood itself. Wood should be treated with a preservative and it is usually necessary to protect it from excessive weathering by oiling, varnishing or painting.
The most common choices are specially formulated wood dressings and water-repellent finishes that soak into the wood, and various tinted varnishes which add a depth of color to the structure.





5 Comments